Bridge Components
Hotwire Native abstracts the integration with its corresponding web bridge (formerly Strada), making it even faster to get started. This assumes you’ve already installed the Hotwire Native Bridge javaScript package on your server.
Let’s walk through how to create a new component on Android.
The component will add a native button item to the right side of the toolbar. Tapping it will “click” the associated link in the HTML.
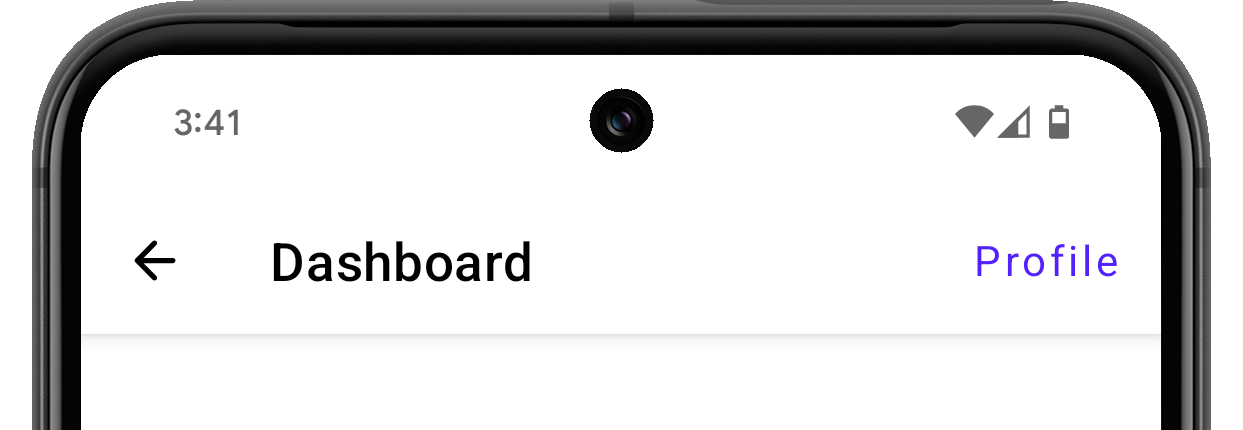 Native button component on Android
Components are made of three parts: the HTML markup, a BridgeComponent Stimulus controller, and the native code. The HTML configures Stimulus which passes messages to Kotlin.
﹟ Stimulus Controller
On your server, add the data attributes needed to wire up the Stimulus controller.
<a href="/profile" data-controller="button" data-bridge-title="Profile">
  View profile
</a>
Then, create a new JavaScript BridgeComponent controller with the following.
import { BridgeComponent } from "@hotwired/hotwire-native-bridge"

export default class extends BridgeComponent {
  static component = "button"

  connect() {
    super.connect()

    const element = this.bridgeElement
    const title = element.bridgeAttribute("title")
    this.send("connect", {title}, () => {
      this.element.click()
    })
  }
}
This component identifies itself as "button" via the static component property. It will pass all messages to a native bridge component identified with the same name.
When data-controller="button" is found in the DOM then connect() is fired. This function calls send() which passes the title of the button in JSON to its native bridge component counterpart.
The third parameter of send, the callback block, is executed when the bridge component replies back to the message, which is explained below. Here, the button is clicked.
﹟ Kotlin Component
In Android Studio, create a new Kotlin file with the following.
class ButtonComponent(
    name: String,
    private val delegate: BridgeDelegate<HotwireDestination>
) : BridgeComponent<HotwireDestination>(name, delegate) {

    override fun onReceive(message: Message) {
        // Handle incoming messages based on the message `event`.
        when (message.event) {
            "connect" -> handleConnectEvent(message)
            else -> Log.w("ButtonComponent", "Unknown event for message: $message")
        }
    }

    private fun handleConnectEvent(message: Message) {
        val data = message.data<MessageData>() ?: return

        // Write native code to display a native submit button in the
        // toolbar displayed in the delegate.destination. Use the
        // incoming data.title to set the button title.
    }

    private fun performButtonClick(): Boolean {
        return replyTo("connect")
    }

    // Use kotlinx.serialization annotations to define a serializable
    // data class that represents the incoming message.data json.
    @Serializable
    data class MessageData(
        @SerialName("title") val title: String
    )
}
This component subclasses the BridgeComponent available in the Android library.
onReceive(message) is called when a message is received from Stimulus. Here, the {title} object is unpacked to add a native button to the right side of the screen. When it’s tapped, the performButtonClick() is fired, replying to the message and calling the callback block, clicking the button.
Finally, register the component with the matching "button" name as the Stimulus controller. The best place for this is in an Application subclass for your app, which runs immediately at app startup:
Hotwire.registerBridgeComponents(
    BridgeComponentFactory("button", ::ButtonComponent)
)
See the Hotwire Native Android demo app for a full implementation.
﹟ Add CSS to Hide Bridged Elements
We’ve now set up "button" components in the web and native apps. Whenever a native app supports the "button" component, it’ll receive a message from the web component and display its native button.
There’s one final piece to finish. We want to hide the web button when a native button is being displayed in the native app. It’s easy to write scoped css that is only applied if:
- A particular version of the native app supports the
"button"component - A particular element in your app is connected to a
"button"component
[data-bridge-components~="button"]
[data-controller~="button"] {
  display: none;
}